
利用GitHub的OAuth授权实战
身份注册
要想得到一个网站的OAuth授权,必须要到它的网站进行身份注册,拿到应用的身份识别码 ClientID 和 ClientSecret
传送门https://github.com/settings/applications/new
有几个必填项。
Application name:我们的应用名;Homepage URL:应用主页链接;Authorization callback URL:这个是github回调我们项目的地址,用来获取授权码和令牌
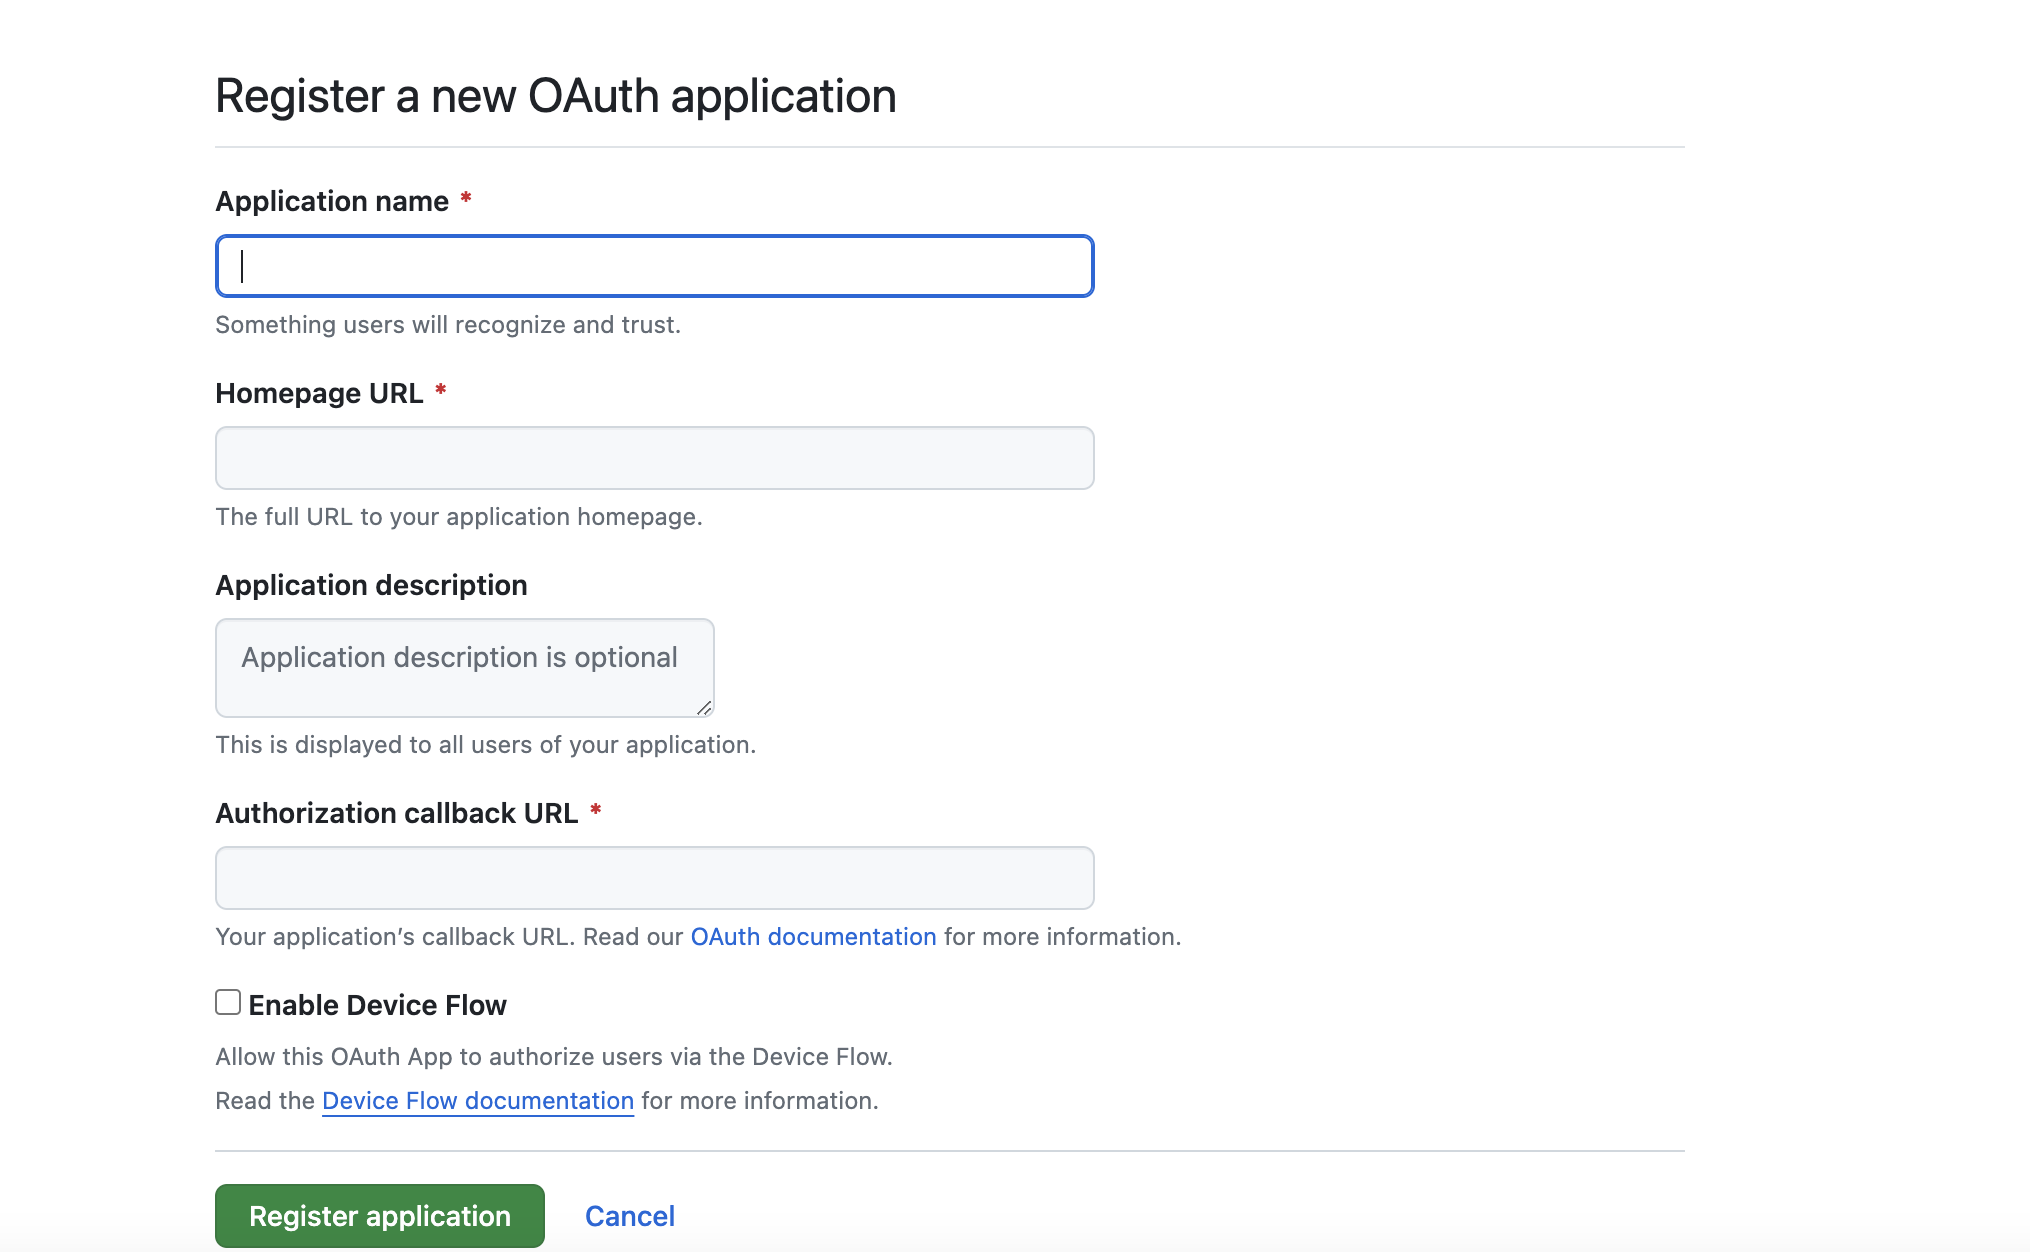
提交后会看到就可以看到客户端ClientID 和客户端密匙ClientSecret,到这我们的准备工作就完事了
授权开发
第1步:客户端向资源拥有者发送授权请求,一般资源拥有者的资源会存放在资源服务器
我们在这里新建一个html界面,用来模拟登录请求
<!DOCTYPE html>
<html lang="en">
<head>
    <meta charset="UTF-8">
    <meta name="viewport" content="width=device-width, initial-scale=1.0">
    <title>Login Page</title>
    <script>
        function login() {
            alert("登录")
            window.location.href = 'https://github.com/login/oauth/authorize?client_id=a98e2191927c000f4eac&redirect_uri=http://localhost:8080/authorize/redirect'
        }
    </script>
</head>
<body>
<h1>Welcome to the Login Page</h1>
<button onclick="login()">Login</button>
</body>
</html>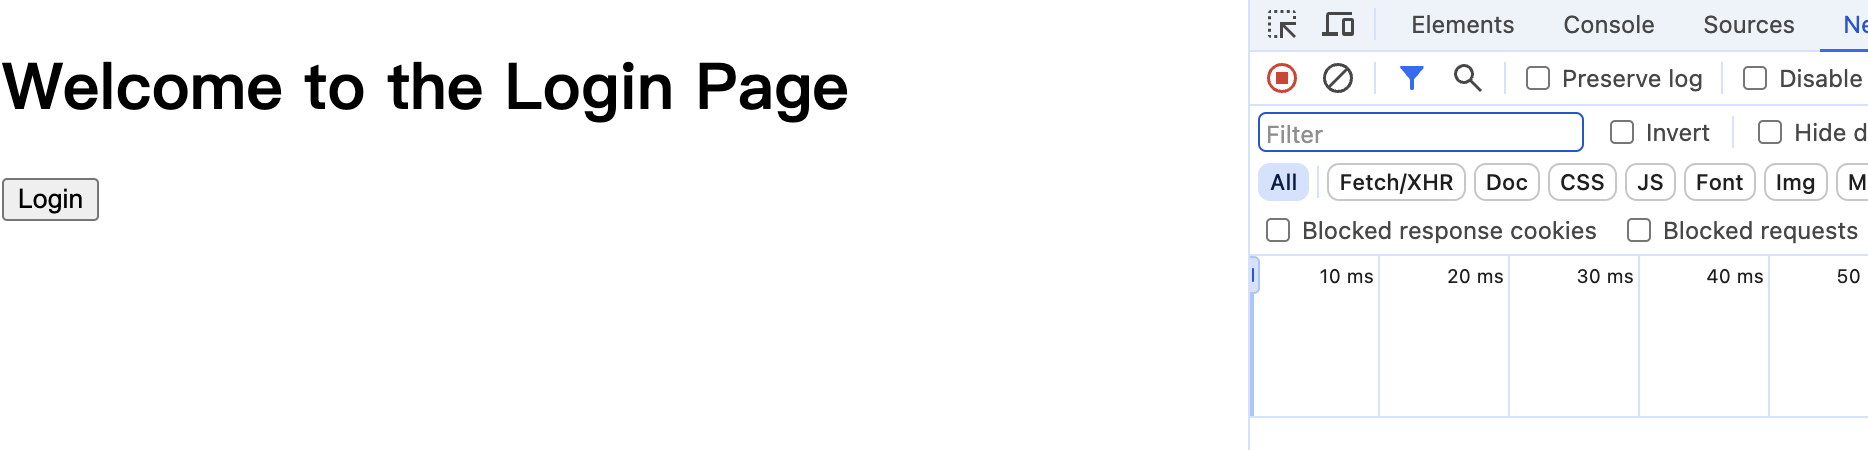 第2步:客户端会收到资源服务器的授权许可
当我们点击登录按钮,会提示让我们授权,同意授权后会重定向到authorize/redirect,并携带授权码code;如果之前已经同意过,会跳过这一步直接回调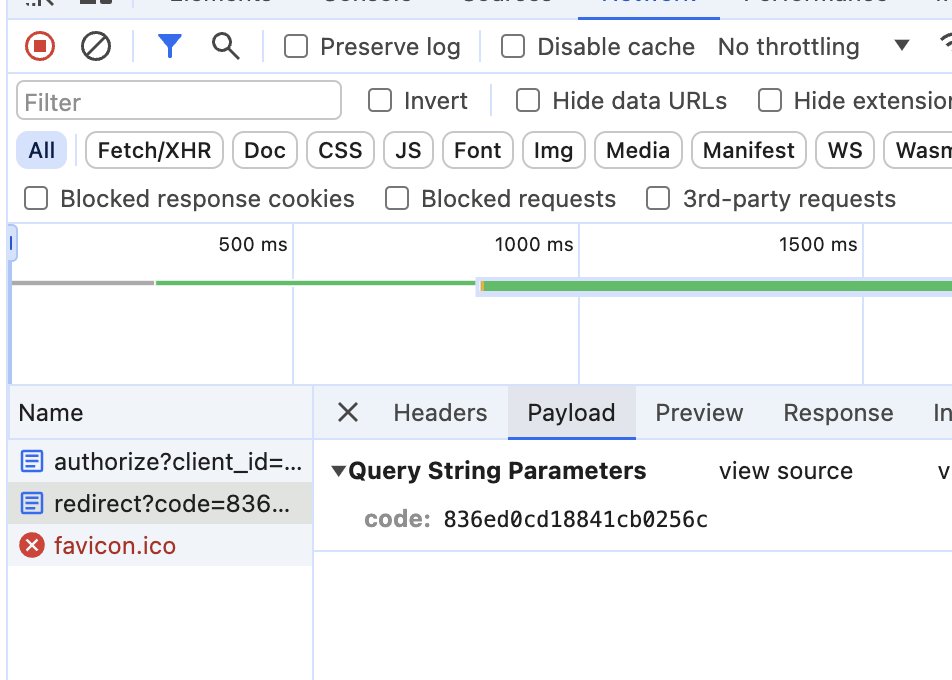 第3步:客户端拿到许可之后,再向授权服务器发送一次验证,给客户端颁发一个Access Token访问令牌
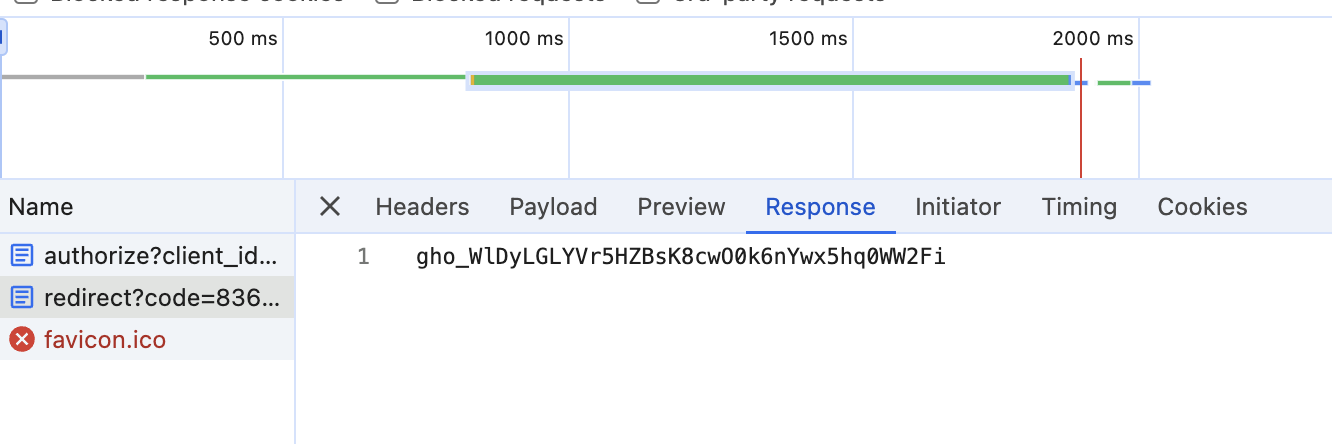
授权后紧接着就要回调 adminflow 网站接口,拿到授权码以后拼装获取令牌 access_token的请求链接,这时会用到客户端密匙client_secret
第4步:客户端拿到令牌之后,交给资源服务器
 第5步:资源服务器会将获取到的令牌传给认证服务器验证令牌的有效性。
第6步:资源服务器验证令牌通过之后,就会返回一个受保护的资源。
package org.pt.controller;

import org.springframework.beans.factory.annotation.Value;
import org.springframework.http.*;
import org.springframework.web.bind.annotation.GetMapping;
import org.springframework.web.bind.annotation.RequestParam;
import org.springframework.web.bind.annotation.RestController;
import org.springframework.web.client.RestTemplate;


@RestController
public class UserController {
    @Value("${github.clientId}")
    private String clientId;

    @Value("${github.clientSecret}")
    private String clientSecret;


    @GetMapping("/authorize/redirect")
    public String githubCallback(@RequestParam("code") String code) {
        String tokenUrl = "https://github.com/login/oauth/access_token";
        String requestBody = "client_id=" + clientId + "&client_secret=" + clientSecret + "&code=" + code;
        HttpHeaders headers = new HttpHeaders();
        headers.setContentType(MediaType.APPLICATION_FORM_URLENCODED);
        HttpEntity<String> requestEntity = new HttpEntity<>(requestBody, headers);
        RestTemplate restTemplate = new RestTemplate();
        ResponseEntity<String> response = restTemplate.exchange(tokenUrl, HttpMethod.POST, requestEntity, String.class);
        if (response.getStatusCode() == HttpStatus.OK) {
            // Extract access token from response body
            String[] parts = response.getBody().split("&");
            for (String part : parts) {
                System.out.println(part);
                if (part.startsWith("access_token")) {
                    String[] split = part.split("=");
                    return split[1];
                }
            }
        }
        return null;
    }

}
我们这里拿到许可之后,向服务器发送一次验证,获取access toke,有了令牌以后开始获取用户信息,在 API 中要带上access_token
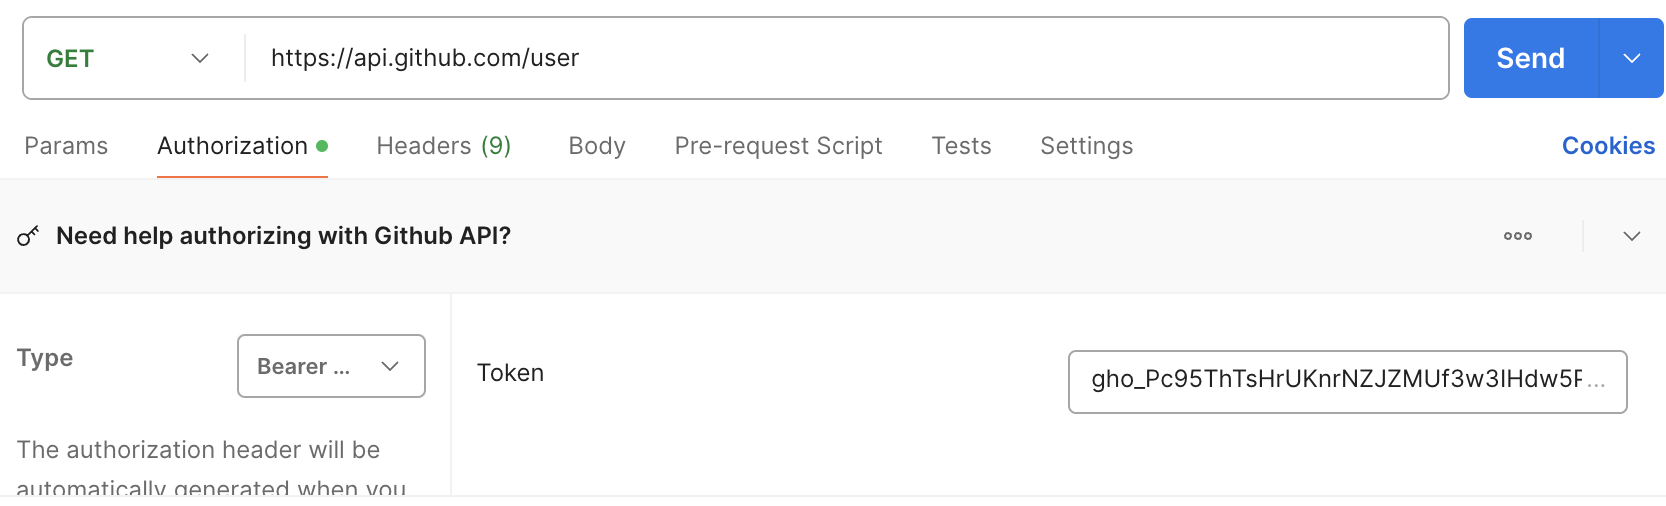
利用postman发送请求,请求地址为https://api.github.com/user
加入Authorization,Type为Beare 值为返回的access token
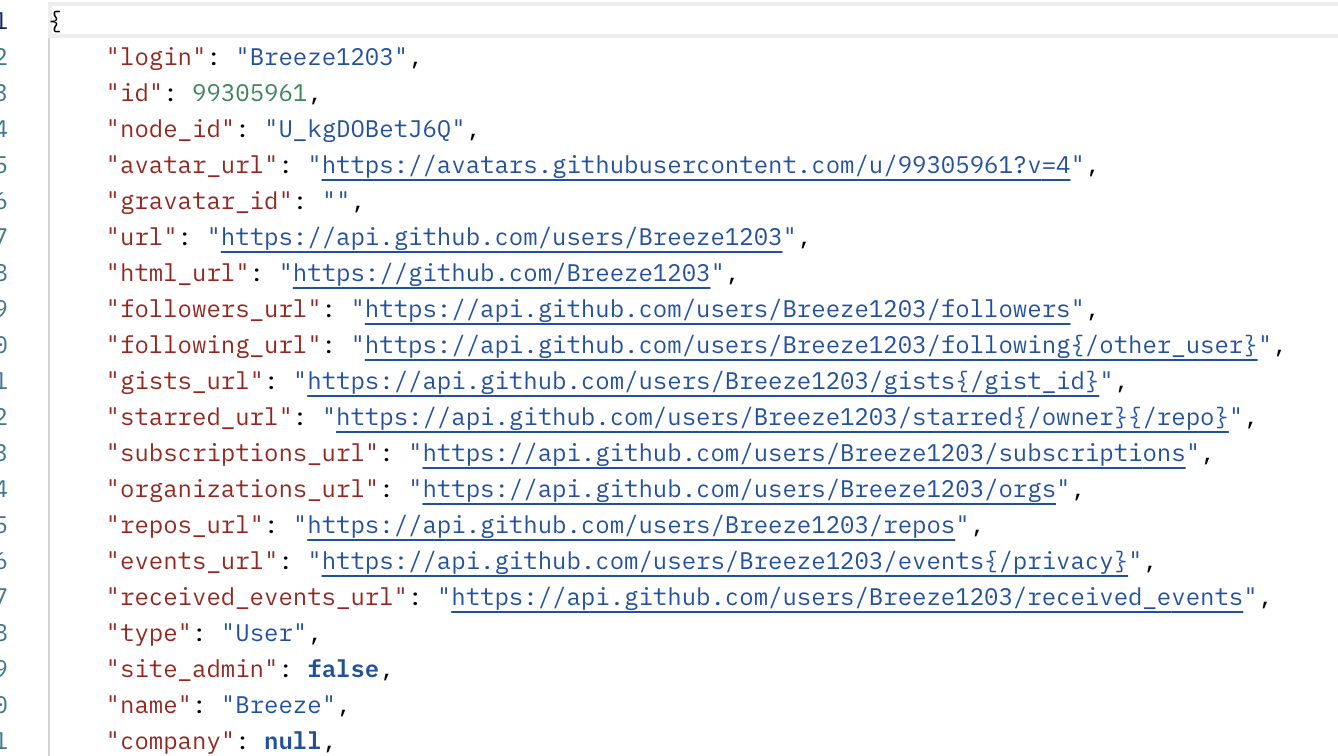
请求结果
返回的用户信息是 JSON 数据格式,如果想把数据传递给前端,可以通过 url 重定向到前端页面,将数据以参数的方式传递
 源代码https://github.com/Breeze1203/JavaAdvanced/tree/main/springboot-demo/spring-boot-oAuth2